Nessiah wrote:I don't think the forest fit well with the bg.Well I guess this is just an IMO.
KimiYoriBaka wrote:the forest looks great. However, somehow it seems like it's too photorealistic to be placed in the same story as a bg using the technique before that. Do you know of any way to get the forest to have a feel more like the bg before it?
Before we begin, let's first stop and ask... what is it that I wanted?... How am I going to achieve what I wanted?...
what is it that I wanted?
For this case, we want to make a forest that looked like it was hand drawn or maybe something out of anime, to make it blend
with other hand drawn sprites which leads us to the next question...
How am I going to achieve what I wanted?
The most obvious answer would be to draw the individial trees "manually" but were a bunch of lazy/busy/untalented people and wanted a quick, easy and dirty way to achive the same result... agree, right?
For this tutorial you first need to have a tree texture to play with...download one from here... (thanks adrix89)
http://www.sharecg.com/v/7455/Texture/t ... with-alpha
Let's take a good look at the downloaded tree... what makes it look, realistic? Maybe it's the insane amount of details in the leaves or perhaps the huge amount of color palette used. Now compare this with anime/handdrawn trees... color palette is limited to say up tp 10 shades of color... I dunno... but it's generally more pleasing to look at... maybe has something to do with colors but no matter (Bah... I am running out of good english words)
I will assume the following...
- You have Photoshop and know how to use photoshop
- 10 minutes free time
- Patience
With all in place, I now present you...
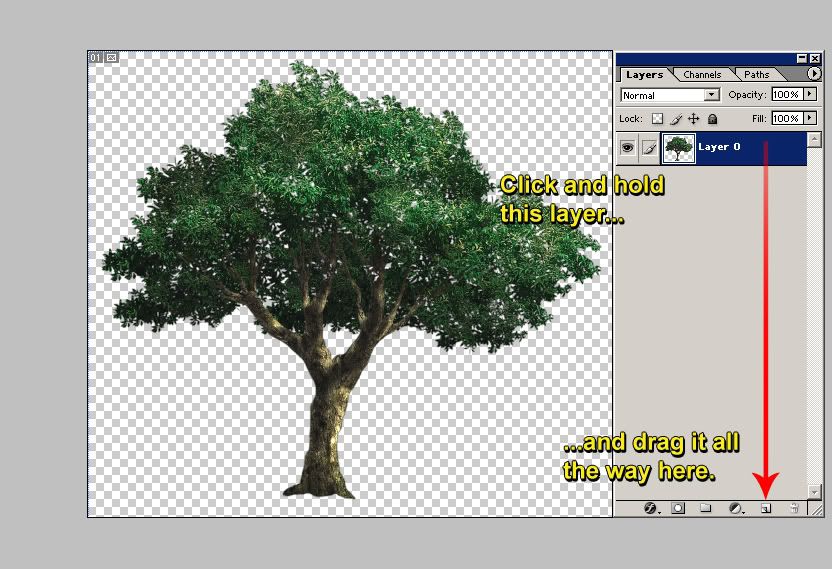
 Step 1:
Open the downloaded tree texture in photoshop. You should see the tree texture being the only layer present. Duplicate the layer (see screenshot below)
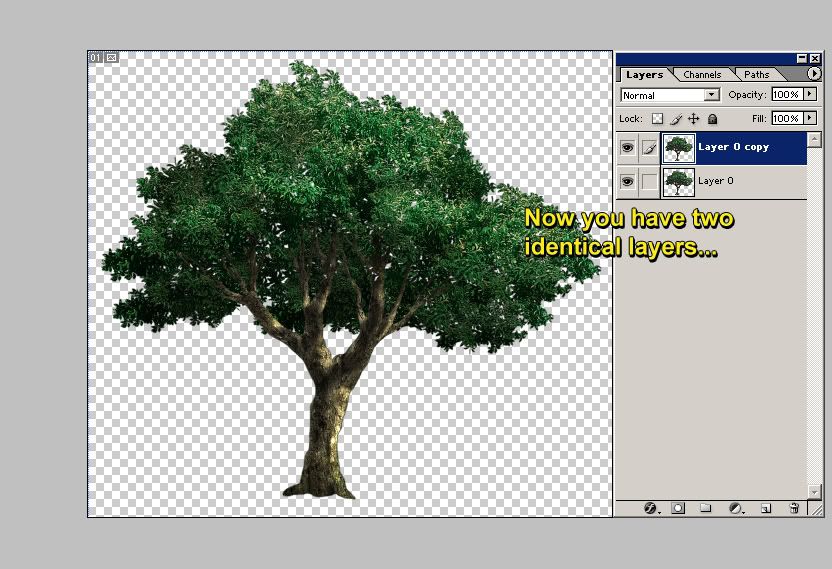
If done correctly, you should see something like this (see screenshot below)
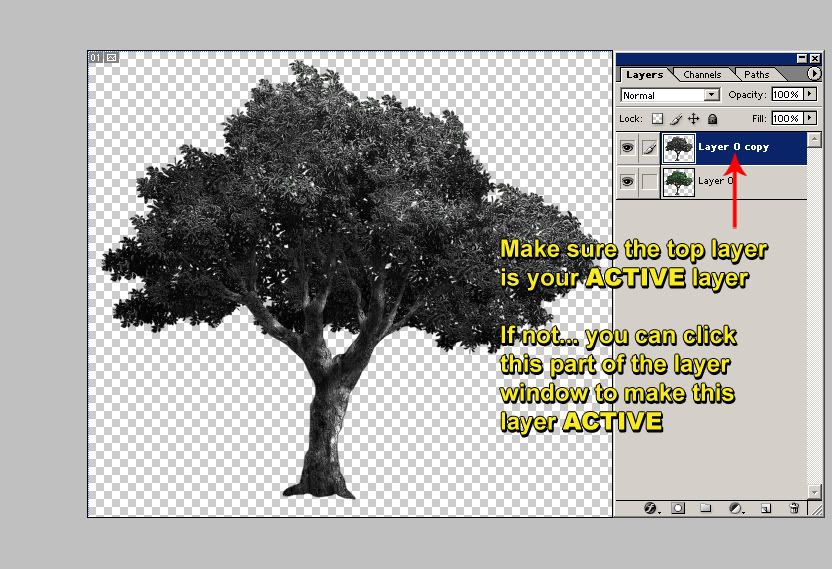
 Step 2:
Make sure you have the topmost layer as your current active layer and desaturate it (SHIFT + CTRL + U) to make it gray (see screenshot below)
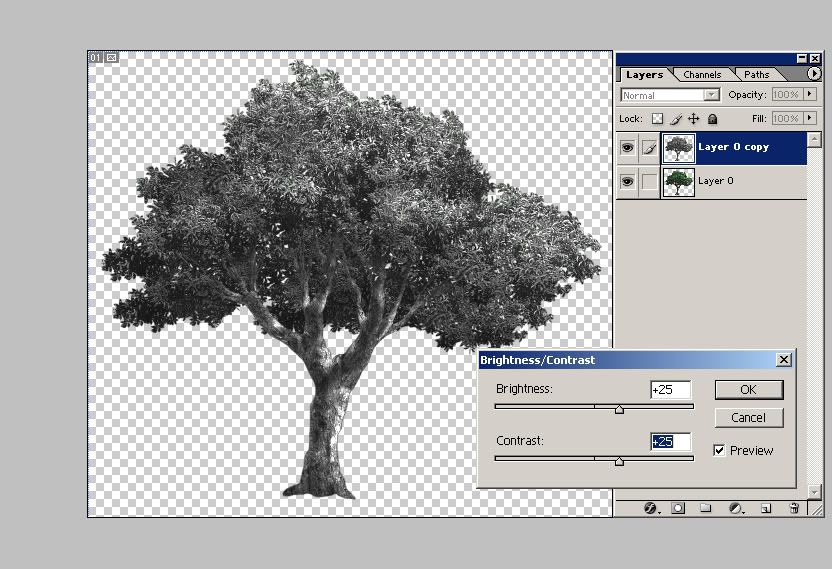
 Step 3:
See the tabs on top of photoshop?... go to IMAGE > ADJUSTMENT > BRIGHTNESS/CONTRAST and copy the following settings. Make sure you have the topmost layer as your current active layer (see screenshot below)
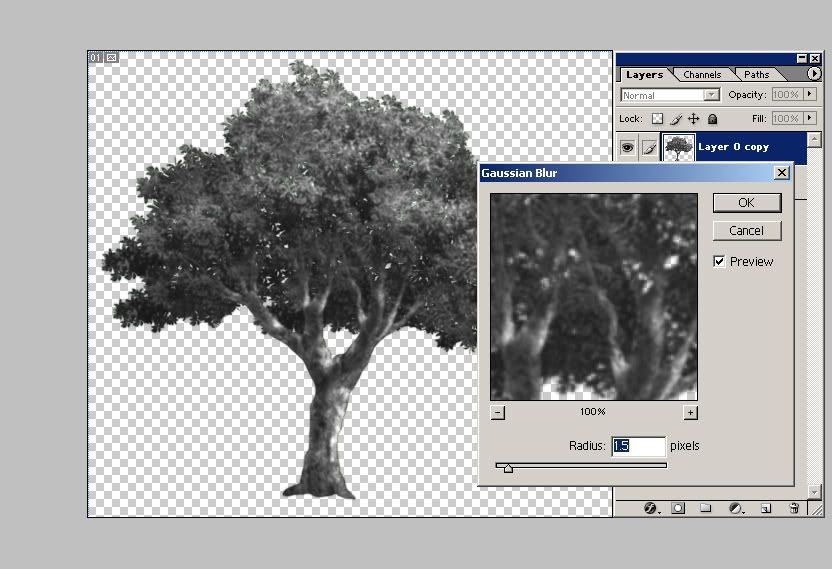
 Step 4:
Again, look at the tabs on top of photoshop and go to FILTER > BLUR > GAUSSIAN BLUR and copy these settings (see screenshot below)
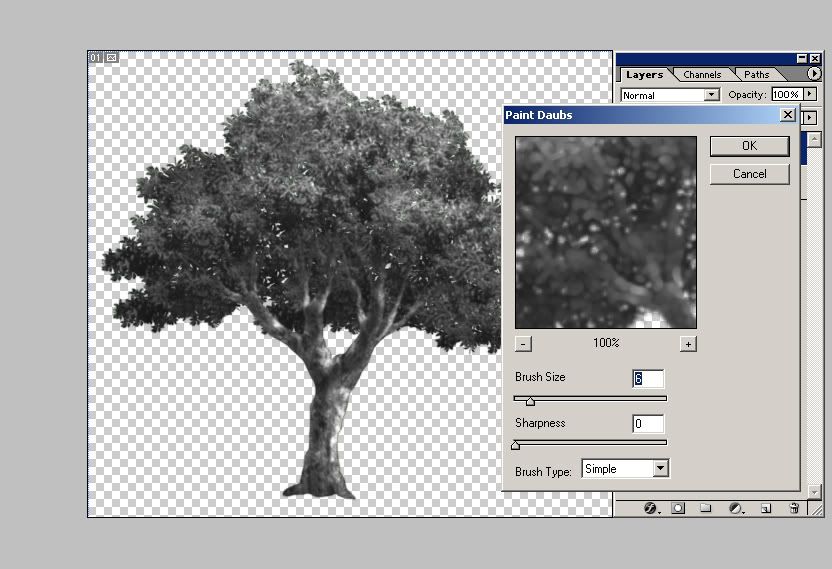
 Step 5:
You know the drill... Tabs on top of photoshop. Go to FILTER > ARTISTIC > PAINT DAUBS and copy these settings (see screenshot below)
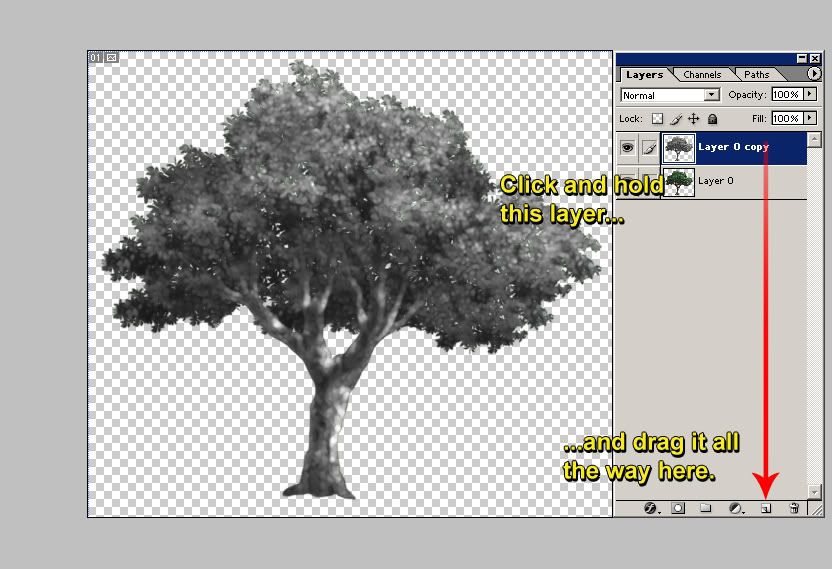
 Step 6:
Duplicate the current active layer you just edited (see screenshot below)
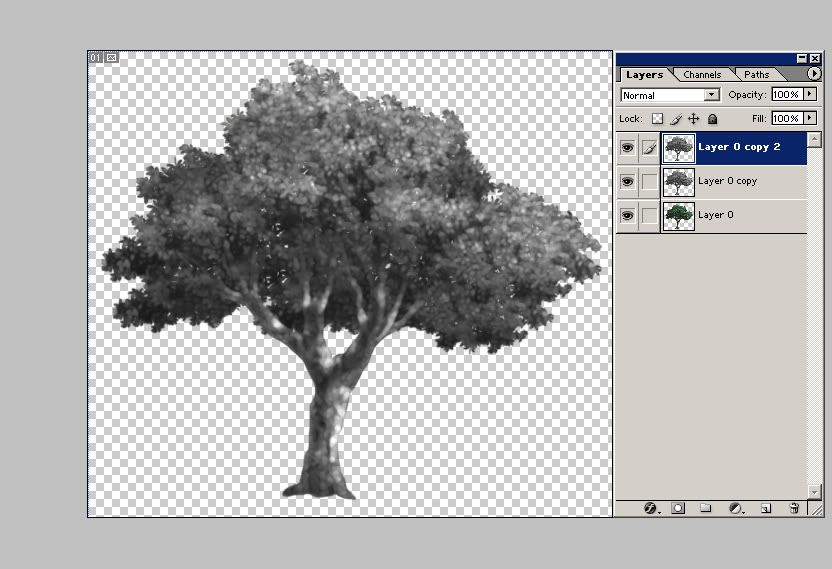
If done correctly, you should see something like this (see screenshot below)
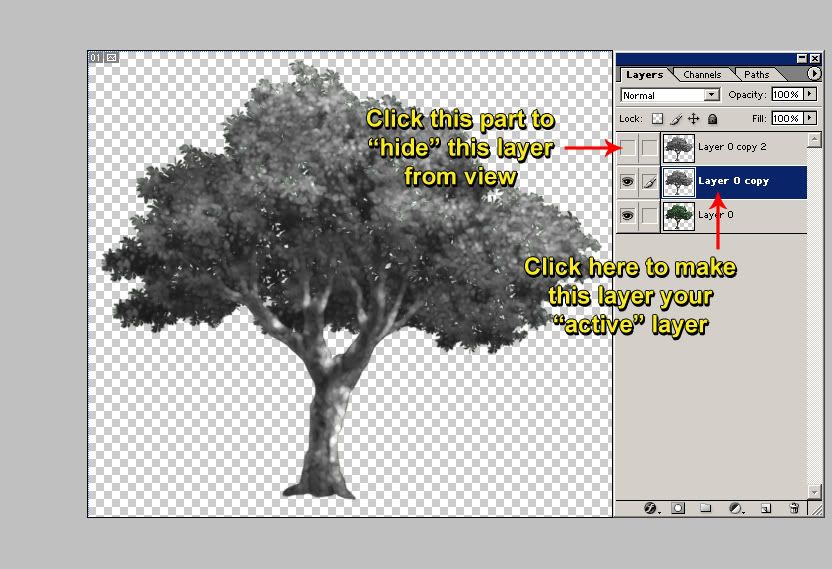
 Step 7:
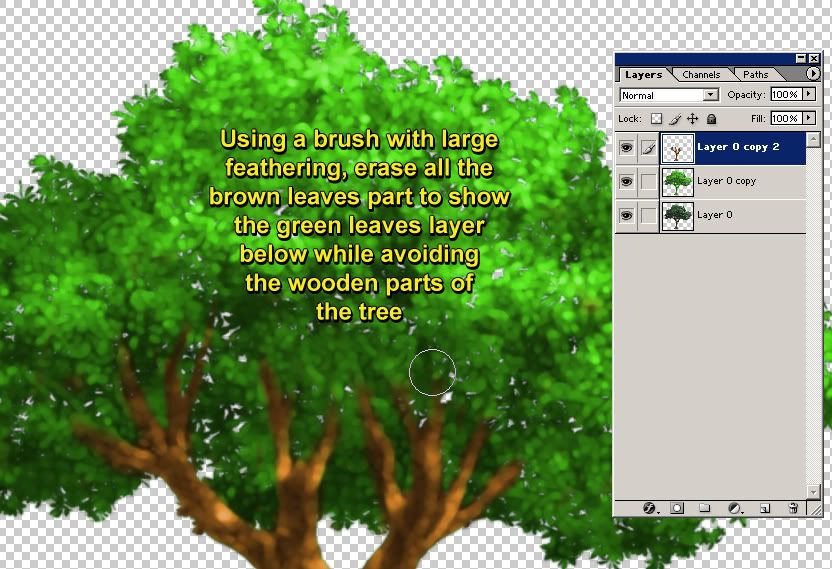
Follow the instructions you see on screen (see screenshot below)
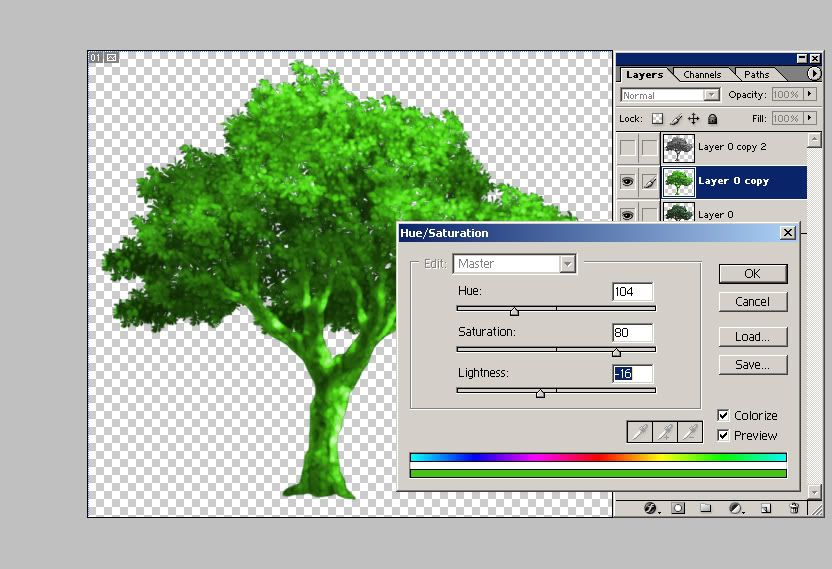
 Step 8:
Yes... we go back to the tabs again. Go to IMAGE > ADJUSTMENT > HUE/SATURATION and copy these settings or until satisfied with the color of the leaves... just concentrate on the leaves for now (see screenshot below)
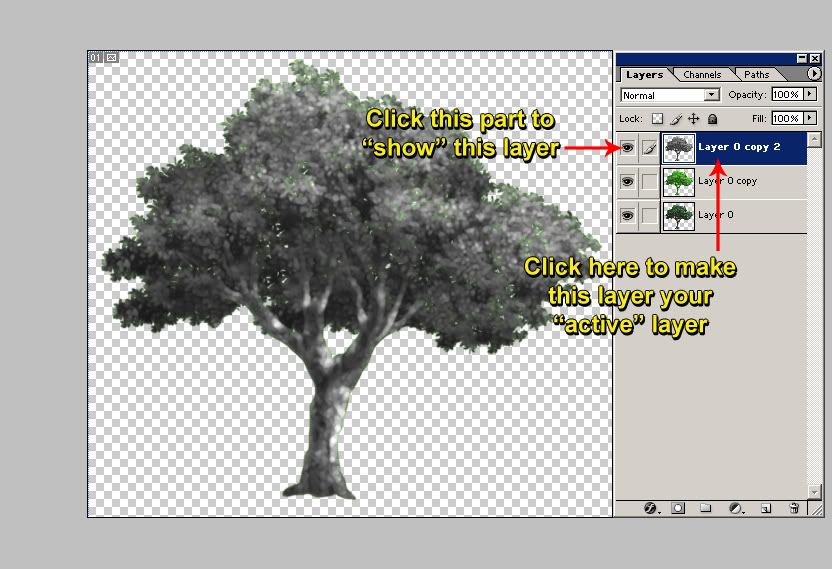
 Step 9:
Follow the instructions you see on screen (see screenshot below)
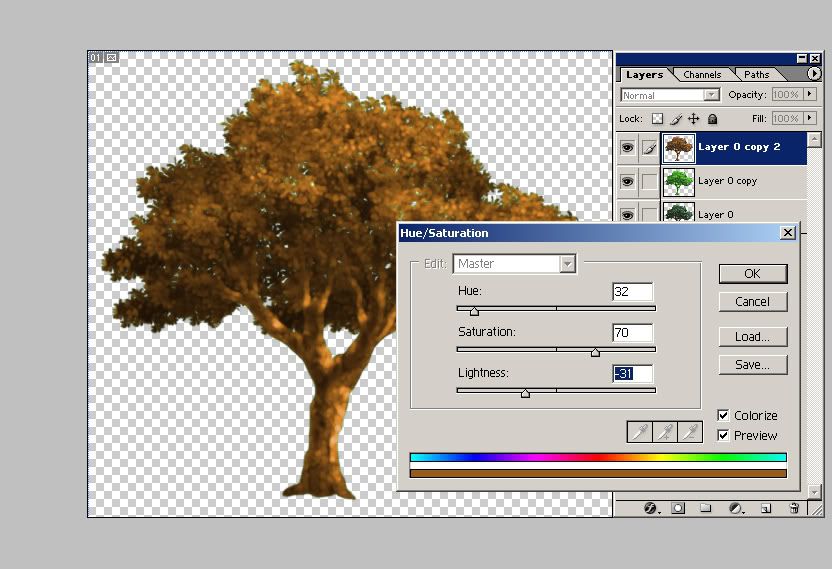
 Step 10:
Tabs... again. Go to IMAGE > ADJUSTMENT > HUE/SATURATION (again) and copy these settings or until satisfied with the color of the tree trunk... just concentrate on the tree trunk and ignore the leaves (see screenshot below)
 Step 11:
Follow the instructions you see on screen (see screenshot below)
If done correctly, you should see something like this (see screenshot below) Now see the bottom layer on the layers window?... delete it.
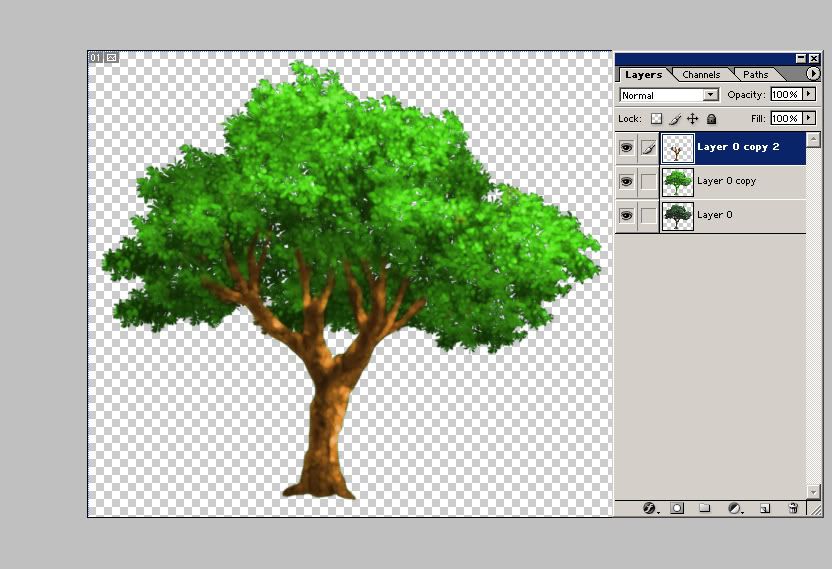
If done correctly, you should see something like this (see screenshot below)
 Step 12:
Follow the instructions you see on screen (see screenshot below)

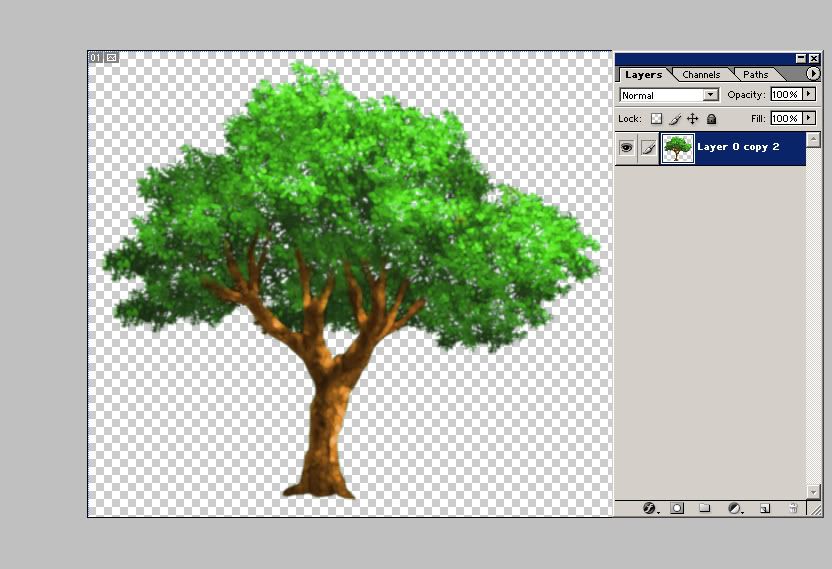
Then merge the two layers (CTRL + E) and if done correctly, you should only have one single layer (see screenshot below)
 Step 13:
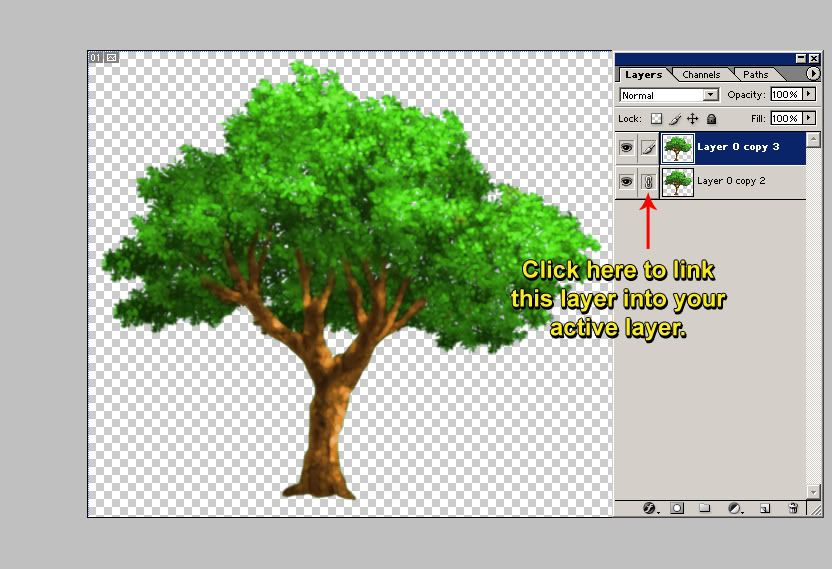
Duplicate your one and only layer (see screenshot below)

Same with the previous step, link the non active layer with the active layer and merge them (CTRL + E)
If done correctly, your tree should have more volume to it (see screenshot below)

I hope this helps...
"POOF" (Disappears)