Page 1 of 1
How do I create characters?
Posted: Sun Apr 09, 2017 12:24 pm
by salceous
Am I able to use Paint Tool Sai to create my characters? If I can't (I need a transparent background), then which program do I use?
What size are my images supposed to be? How do I make it so that when they appear on the screen, they're not floating in the air?
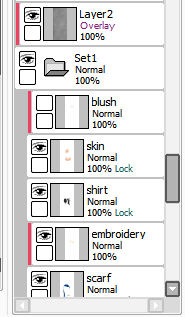
Also, I want to make it so that I can change their facial expressions. Like I can have a base with no face and I can specify which expression I want them to have (see attached image). If I'm able to create these images, how would I code them into Ren'py?
Sorry for the questions but I'm still new

Re: How do I create characters?
Posted: Sun Apr 09, 2017 1:35 pm
by Evy
If you have Photoshop or another image editing program that can open .psd files, you can save your .sai images as .psd and open them in the other program; it will conserve the transparency of the background so you can then convert your image as a .png or whatever other file format you want.
I know there are some versions of SAI that actually have a transparency function, but you'll probably need to dig a little for more information. I actually don't know if mine supports it, so I just use the method above.
Re: How do I create characters?
Posted: Sun Apr 09, 2017 6:39 pm
by Aviala
My SAI doesn't support transparency either, so I just export them through Photoshop like Evy said.
As for the sprites in the engine, you have two options. Either just export the whole body a bunch of times, each with a different experssion. Then you can just define them as spritename normal, spritename happy, etc. That's definitely the simplest way to do it.
If you wanna be fancy and save some filespace, you can use dynamic displayables. They basically work so that you have the base sprite and then the engine adds the face on top, like you would put clothes on a paperdoll. But if those are all the expressions you will use and you won't have a huge cast of characters, it may be easier for you to forget about dynamic displayables for now and focus on the basics.
Re: How do I create characters?
Posted: Sun Apr 09, 2017 8:57 pm
by Imperf3kt
You can always export a blank faced image from Sai, open it in Gimp or Photoshop or program of yoiur choice, then export another image from Sai, this time with a face and overlay it on the other image
L.
In Gimp, you have two options:
Mask the image and save the differences as separate png frames with an alpha layer.
skill required: reasonably high. Quality obtained: professional
Use Gimp's "optimise for gif" python function and save the two layers as separate png frames with an alpha layer.
Skill required: none. Quality: 'meh' at best.
Re: How do I create characters?
Posted: Sun Apr 09, 2017 9:20 pm
by morinoir
umm.. I though the layers that contain character expression must have same canvas size as the faceless (named 'baseSprite' on the picture) layer?? I don't know much about programming this thing on renpy, but my client asked me to do it for his game.
And yes, even when you work on Sai, it's better to save your file as .psd/photoshop file so other program like gimp can open it.
Re: How do I create characters?
Posted: Sun Apr 09, 2017 9:42 pm
by Imperf3kt
They don't have to have the same resolution, but its a little tidier (at the expense of more code needed to position everything)
Re: How do I create characters?
Posted: Mon Apr 10, 2017 4:15 am
by TheUsernameIsTaken
If it is the same SAI I am using:
-Create a new layer at the very bottom, this becomes your background layer
-Use bucket tool and plop a random color ur not using
-Click eye icon to turn the layer off visually
-Export as PNG as it is a sprite
-When exporting, you have two options, choose the one that says something along the lines of -Each pixel has its own opacity-
-If the above doesnt work or doesnt show, yeah its prolly not the same
Re: How do I create characters?
Posted: Mon Apr 10, 2017 11:20 am
by salceous
TheUsernameIsTaken wrote:If it is the same SAI I am using:
-Create a new layer at the very bottom, this becomes your background layer
-Use bucket tool and plop a random color ur not using
-Click eye icon to turn the layer off visually
-Export as PNG as it is a sprite
-When exporting, you have two options, choose the one that says something along the lines of -Each pixel has its own opacity-
-If the above doesnt work or doesnt show, yeah its prolly not the same
Thanks! Do you know how I can create a baseSprite (like in the picture) and then attach a face to it while I'm coding? Would that be harder than just making the expression already on the character while I'm on Sai and then just creating several completed sprites?
Re: How do I create characters?
Posted: Mon Apr 10, 2017 11:52 am
by indoneko
salceous wrote:Thanks! Do you know how I can create a baseSprite (like in the picture) and then attach a face to it while I'm coding? Would that be harder than just making the expression already on the character while I'm on Sai and then just creating several completed sprites?
I assume that you don't have much experience in coding, so I'll say yes... it's harder.
If you're new to this, I suggest that you use simple sprites first.
But if you really want to know about the more complex way to display your sprite, you can start searching renpy documentation about "Displayable", "im.composite", "live.composite" and ATL
Code: Select all
image girl clothed happy = im.Composite(
    (300, 600),
    (0, 0), "girl_body.png",
    (0, 0), "girl_clothes.png",
    (100, 100), "girl_happy.png"
    )

image eileen composite = LiveComposite(
    (300, 600),
    (0, 0), "body.png",
    (0, 0), "clothes.png",
    (50, 50), "expression.png")
Re: How do I create characters?
Posted: Tue Apr 11, 2017 3:07 pm
by Ghost of Crux
I'm actually not aware which versions of SAI /don't/ support it, but check if when you export as PNG, a box pops up or not. If it does and you have the option between 24 bpp (RGB) and 32 bpp (ARGB), choose the latter.
Note that if you're using certain layer modes like Multiply/Screen/etc, it won't give you a transparent background. The workaround to this is to put your entire drawing/layers into a folder, put the different-mode-layer above the folder, and use clipping group.