
Last time I worked on a sprite of my own personal stuff, I took a bunch of screenshots to make a tutorial and I later forgot about them ^^;
I just found them again and uploaded them so you can see what I did :'D
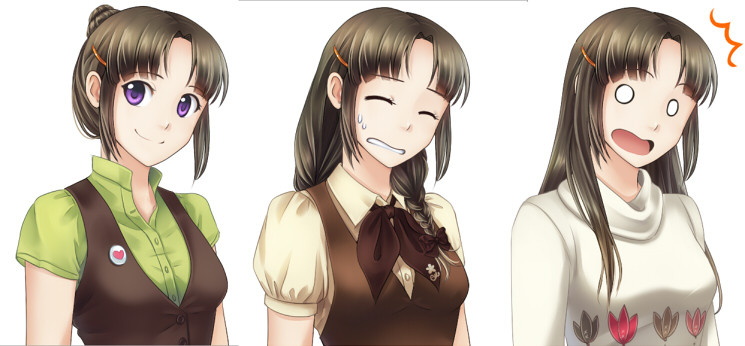
The process is for the base nude sprite, base face, braid hairdo and first outfit (the green and brown one)
The whole thing took about 2 hours and a half, based on the original name of the screenshots.
I did this thins 2 years ago, so there are probably things I'm forgetting >>;
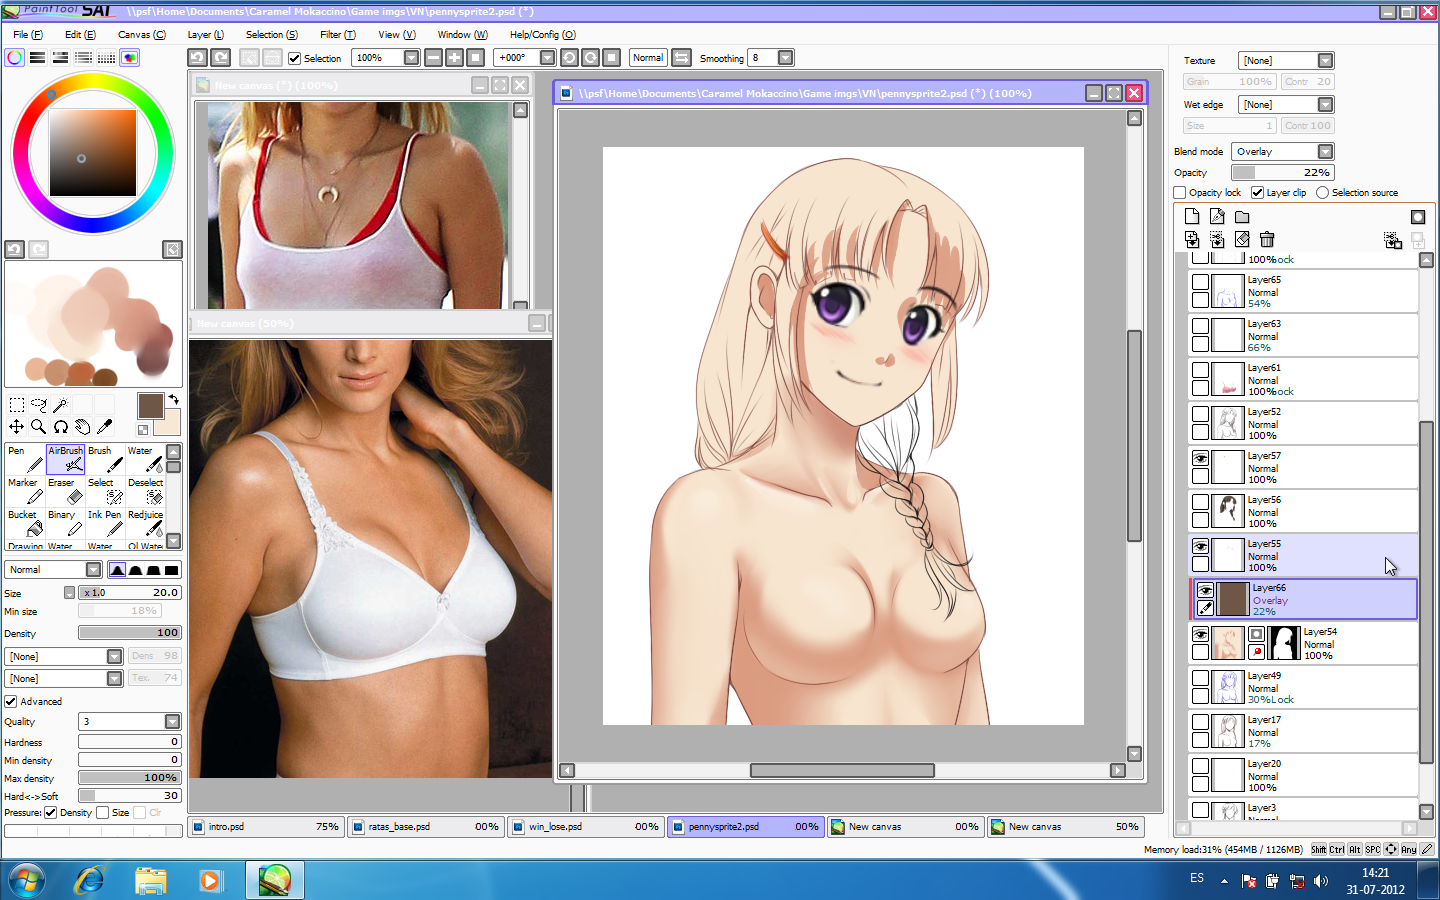
All done in SAI, you can see the brush settings and layers in the screenshots, nothing has been cropped.
WARNING: Some photos of girls in bras in there for references :3
http://deji.ishtera.net/pics/cmstuff/penny%20process/
As for the breakdown of the process itself (THIS IS GOING TO BE LONG)
Click the numbers to go to the correct screenshot.
1- I did a sketch separated in layers and slapped some colors. Then I resized the whole thing and put a white layer at lowered opacity to draw on top.
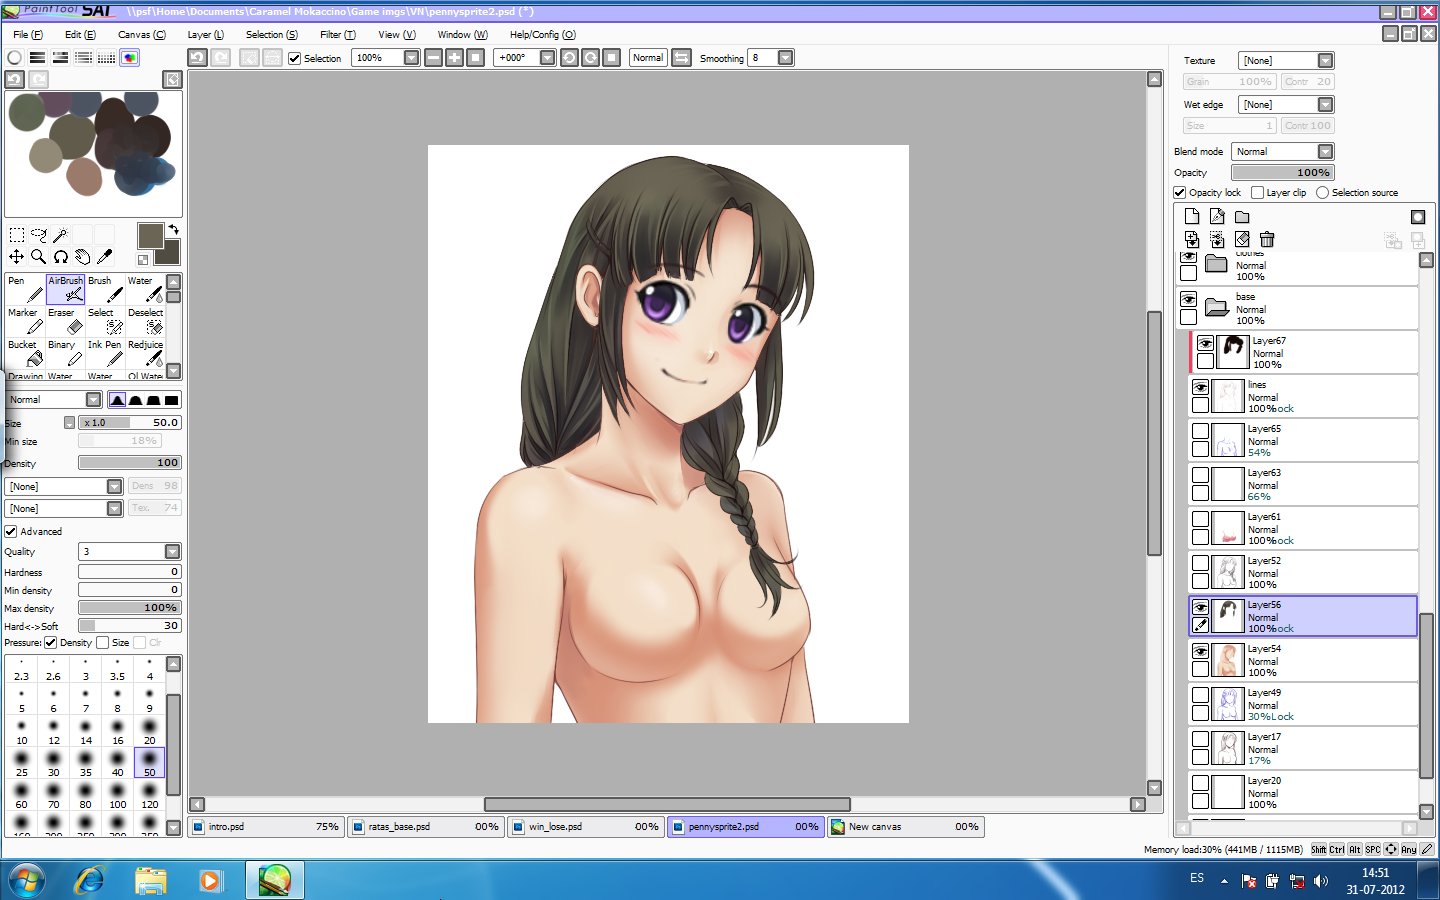
2- I start with the lines of the nude base sprite, since I'm going to give her different outfits, and add some thickness to certain areas; it gives the lineart some character, I think :3 You can see the Sai brush settings on the screenshot.
I also put the braid on a separate layer, since I want it to be on top of the clothes later on.
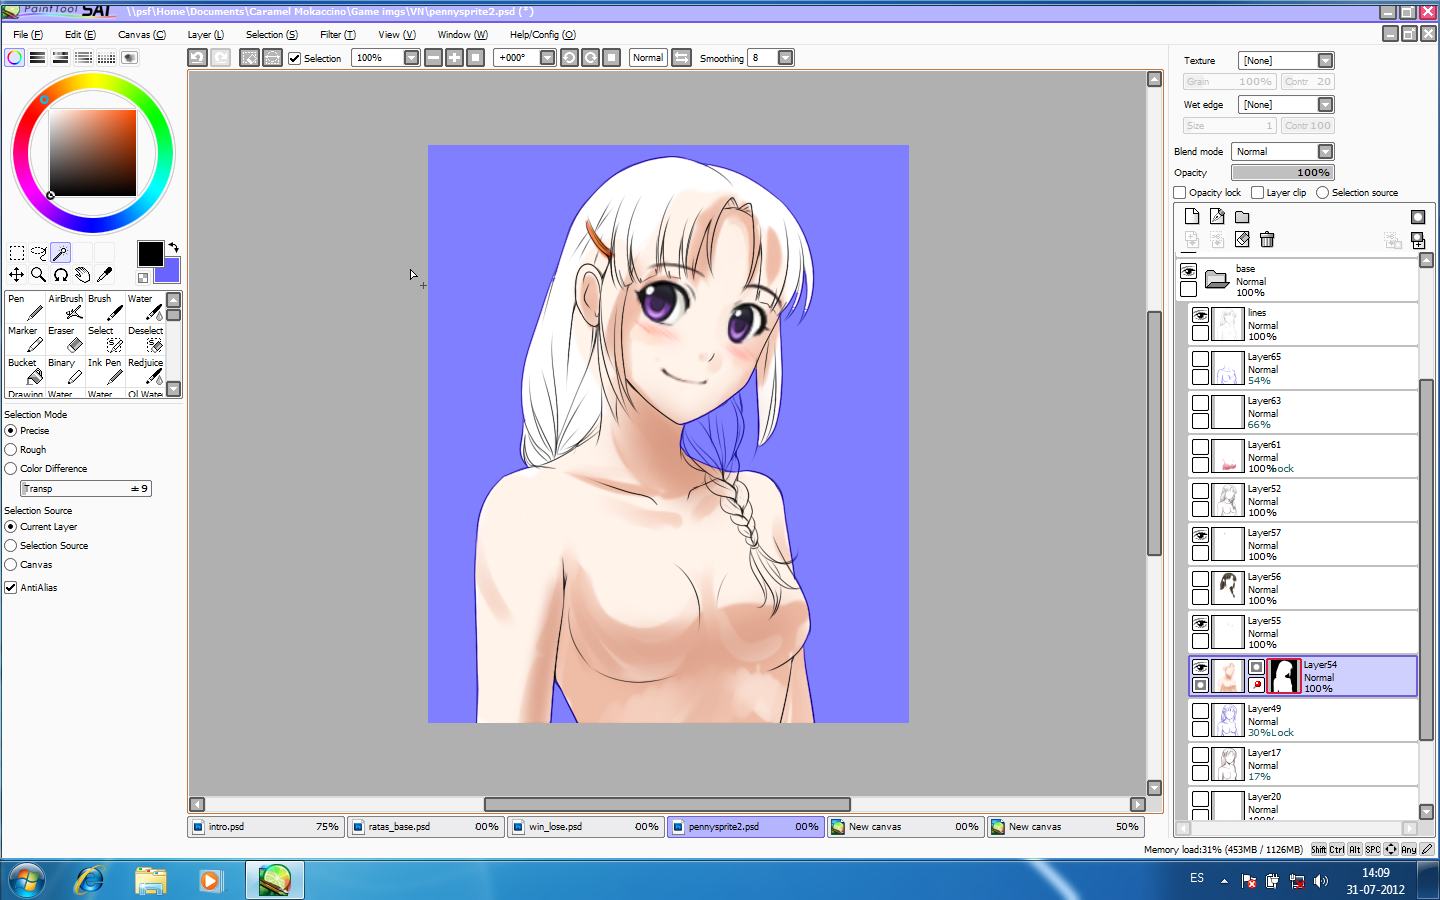
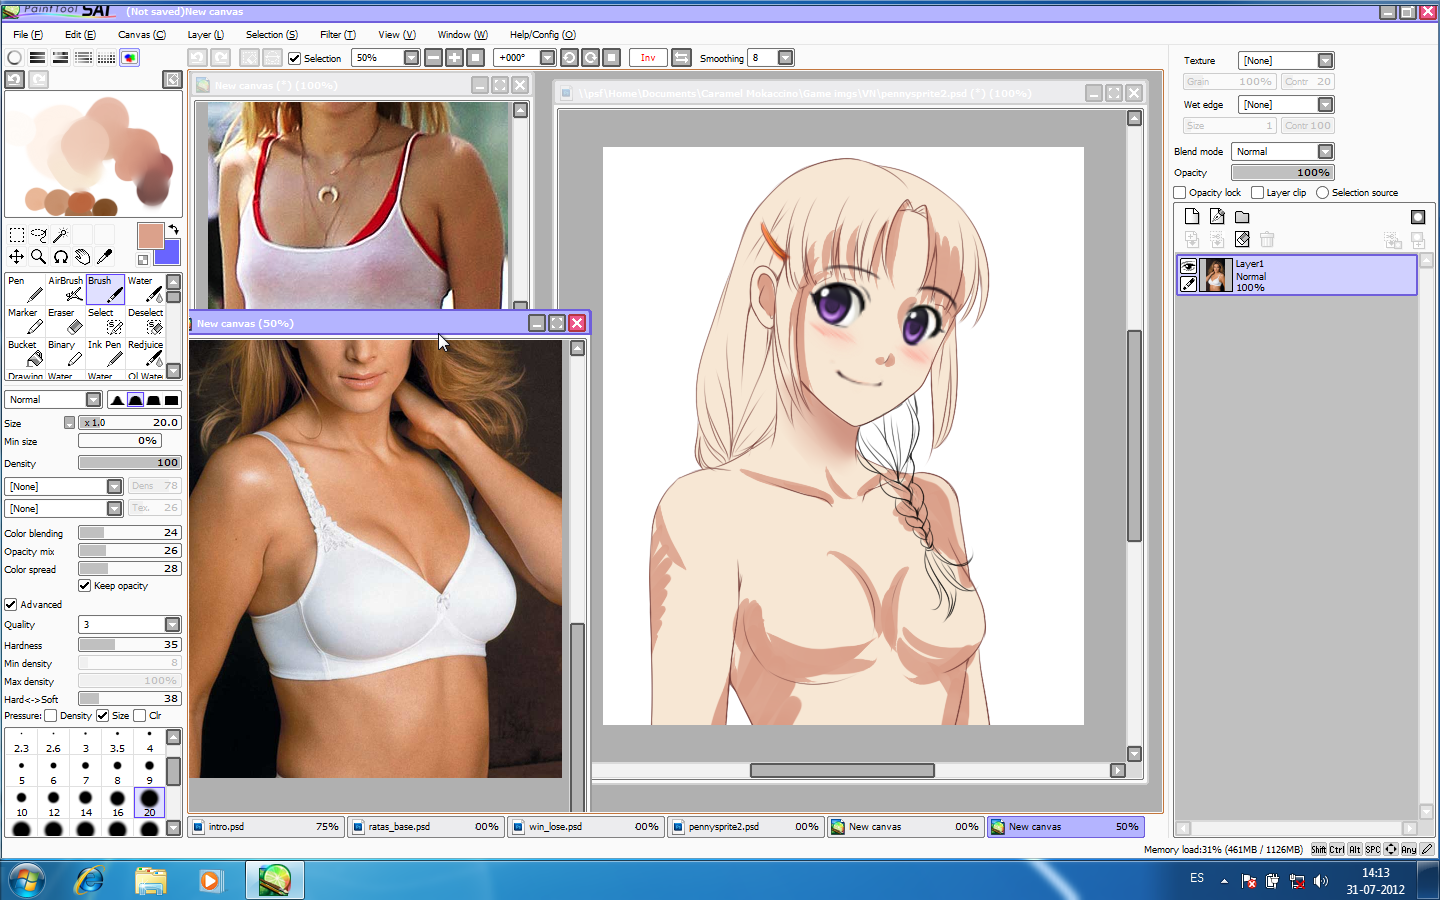
3- I realise the boobs look a bit odd, so I use my google fu to find some pictures of girls wearing bras. Because Penny wears a bra. I've made the mistake of drawing nude sprites referencing unsupported breasts and when I draw the clothes later, they look like... well, they're obviously not wearing bras. Unless that's a preference of yours for your character, go with bra references!
4- Finished inking the nude, with the rough colors from the sketch.
5, 6& 7- Now I'll focus on colouring the skin, so I hide every other layer, select outside the lines, invert selection and fill everything with the base skin color. Also open the handy girl wearing bra reference photo.
8 - I roughly mark where the shadows would be.
9, 10 & 11 - I use the select tool to mark areas and use the airbrush to give it a soft shading. Using mostly the airbrush and water brush I finish shading.
12 & 13- I use overlay and multiply layers to correct the color until I like it.
14 - I add some highlight spots!
15 & 16 - I polish the shading on the face.
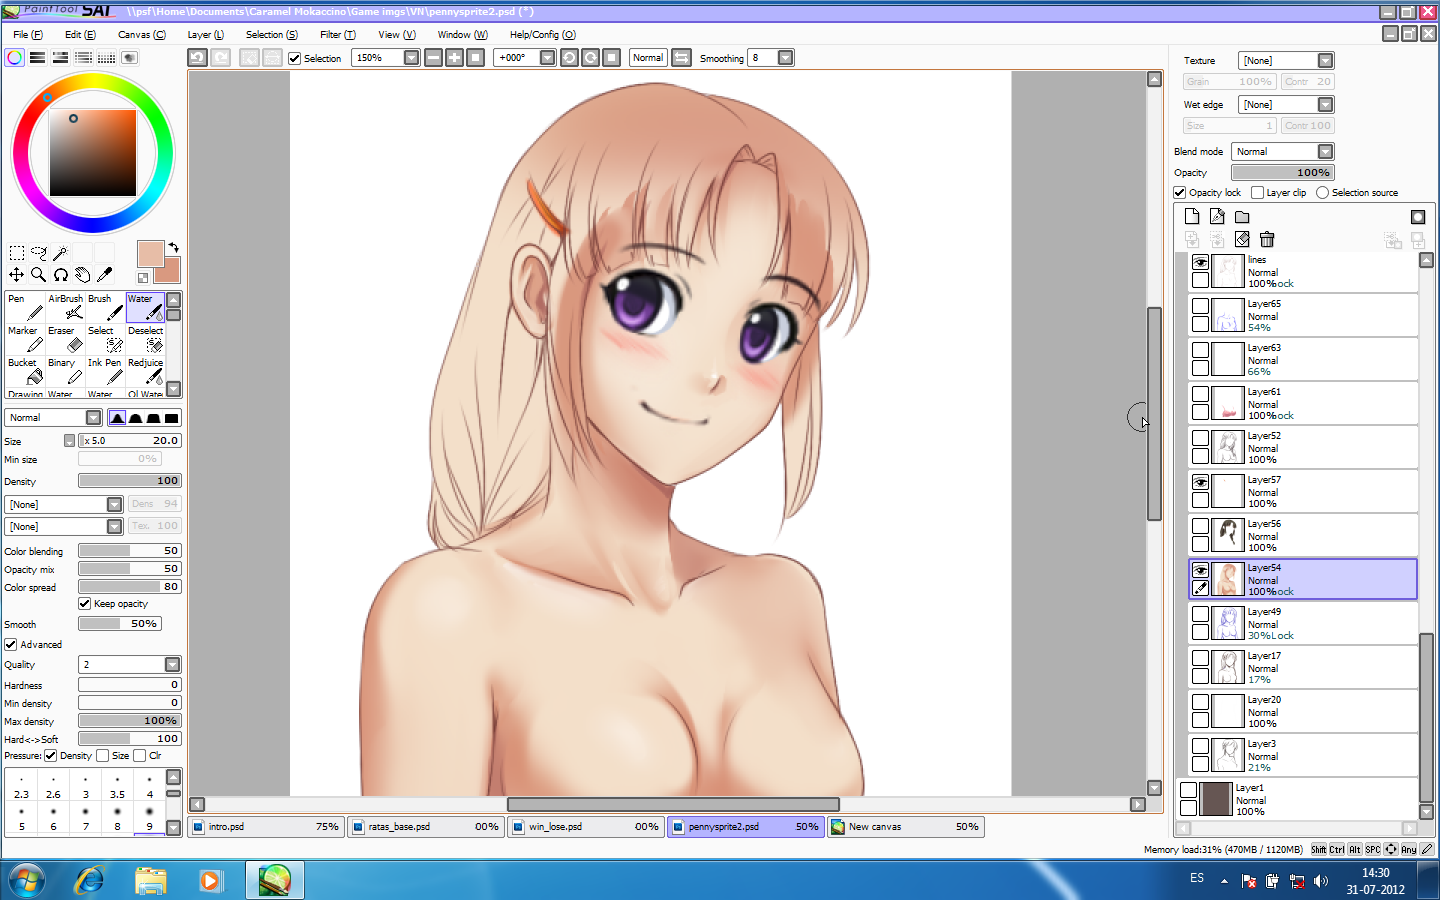
17 & 18 - With an overlay layer, I tone the skin in different areas to give it some tonal variety, reduce the opacity and merge it with the base skin. Tada!
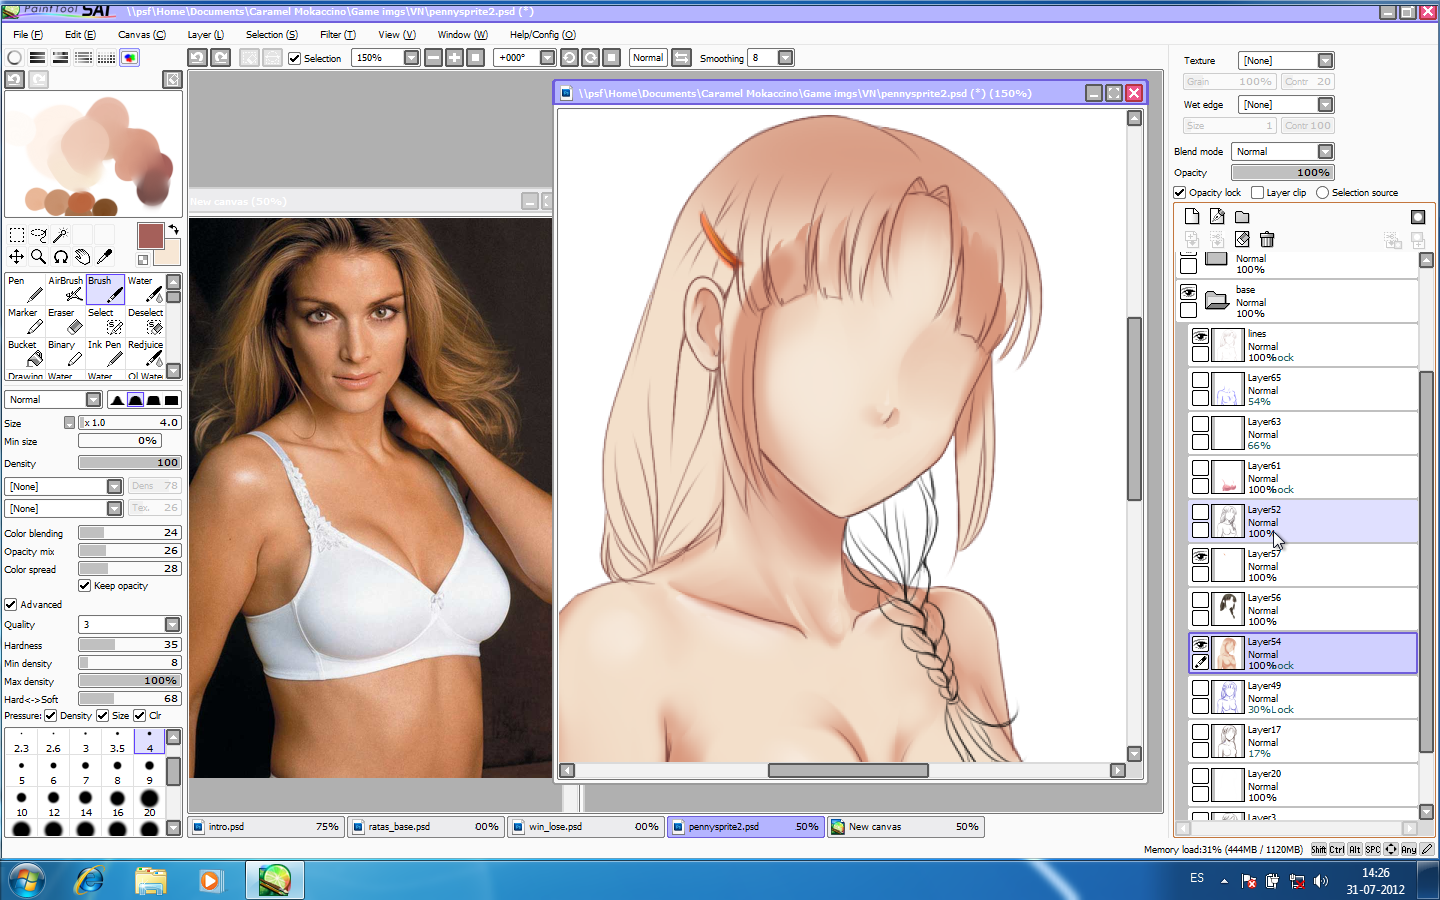
19 & 20 - Now the hair! I'm using the sketch colors as a base. I zoom in and make sure the lines are closed and remove all the little bits that stick out.
21- I do the same with the braid.
22 - I lay the base color with some tonal variation (you can do this with an overlay later, if you want)
23 - I google a girl with a braid for reference! On a new layer, I start laying down some rough shadows.
24, 25, 26, 27- I alternate between the Brush and the Pen for detail shading.
28, 29, 30, 31 - more detail shading, adding strands and working on the braid.
32 & 33 - highlights~
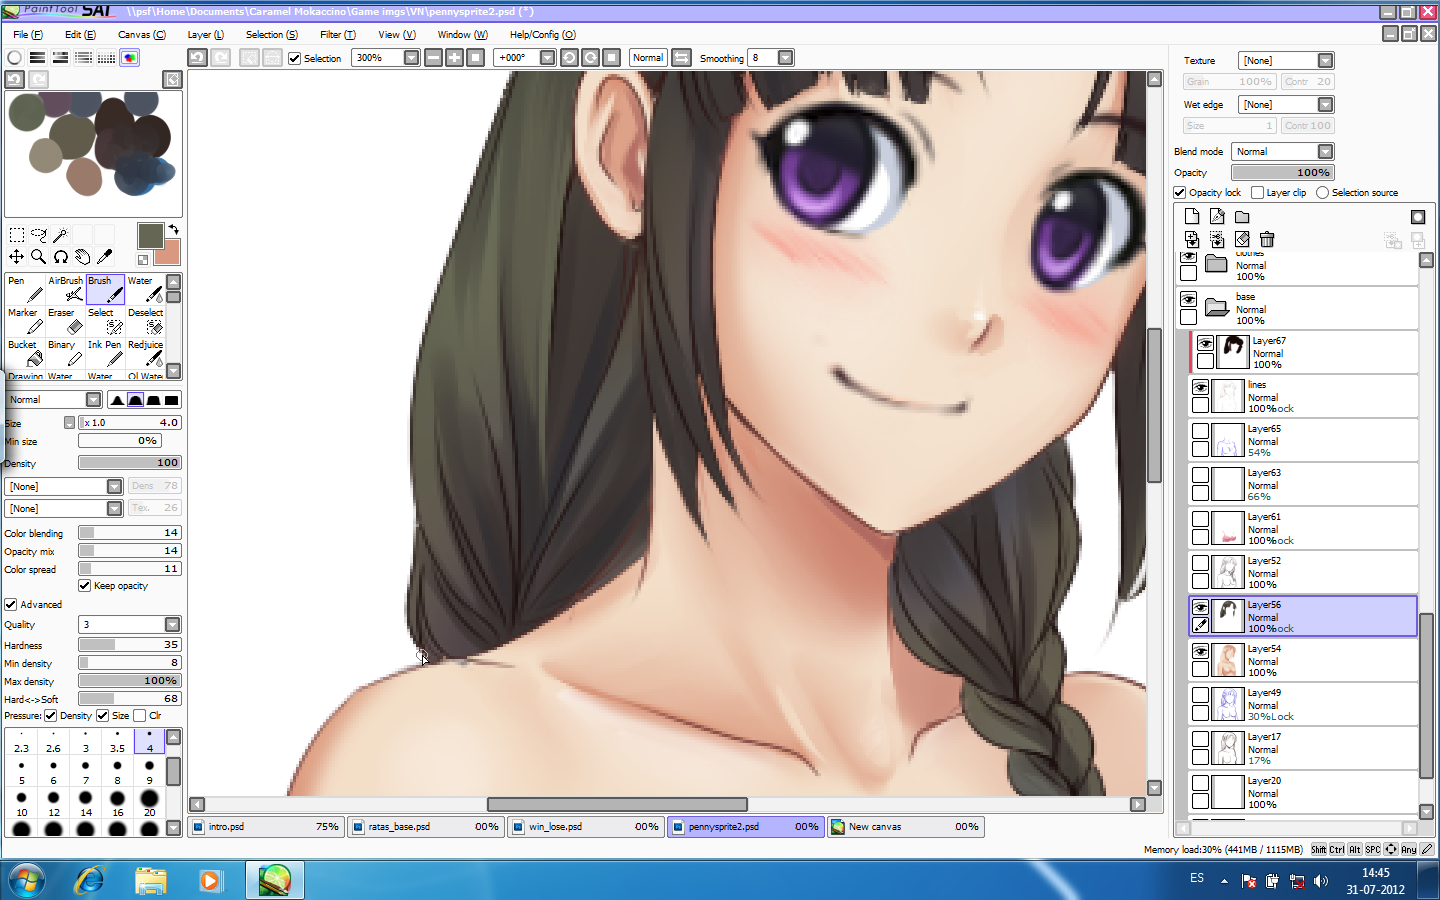
34 - On a new layer, on top of everything and using the airbrush, I add a glow by airbrushing with the skin color. You can do this on top of the hair color layer and then color the lineart bits of the hair with a lighter, more flesh-tone color. That's how I do it now (this sprite is older :'d )
35 & 36 - I take care of the eyebrows and smiling mouth first. I'll use them as a reference for the rest later.
37 & 38 - I take care of the eyes. I lower the opacity of the eyes sketch and draw on top. I color the edges lighter.
39, 40 & 41 - I color the white of the eye and then the iris and pupil. Lastly, I add some reflecting white lights on top of everything.
42 & 43 - I... don't remember what I did here >>;
44 & 45 - With a new clipping mask layer on top of the lines, I color them!
46 - Now for the clothes... On a new folder I have my rough sketch for the first outfit.
47, 48 & 49 - I google some references to make sure I'm getting the clothes right and re-sketch it.
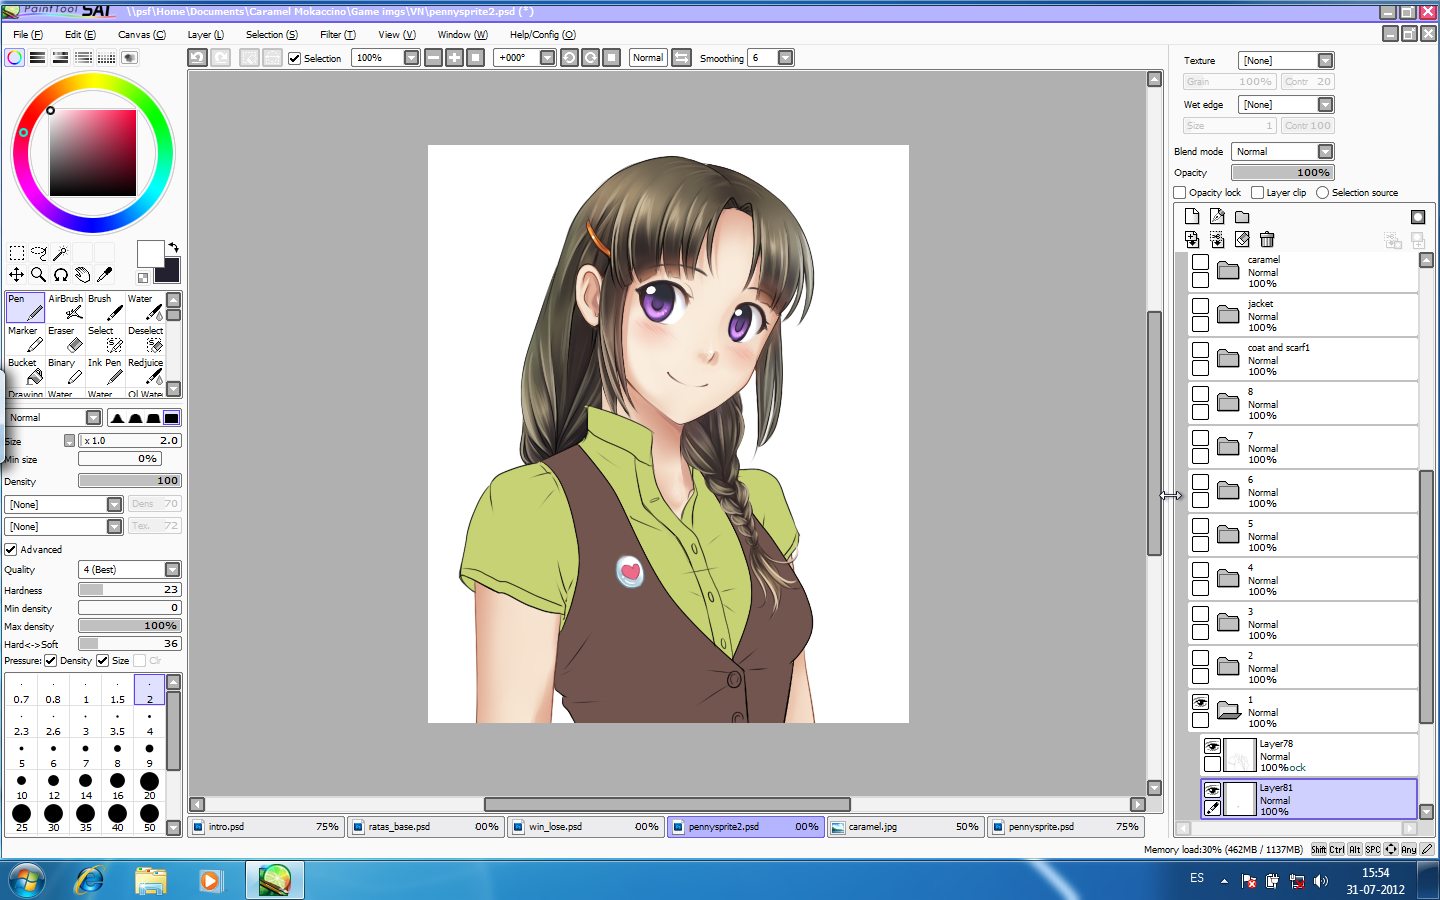
50 & 51 - I ink it just the same as the nude base and lay down the base flat colors, each on a different layer.
52 - Using the same techniques as with the skin and hair, I color the clothes! (and I forgot to take screenshots)
Hope you liked this step-by-step thing :'D
I'll make a new one when I re-work the sprites later ^^;


