[Tutorial] Customizing the Textbox

A place for Ren'Py tutorials and reusable Ren'Py code.
Forum rules
Do not post questions here!

This forum is for example code you want to show other people. Ren'Py questions should be asked in the Ren'Py Questions and Announcements forum.
Message
Author
User avatar
Kia
Eileen-Class Veteran
Posts: 1040
Joined: Fri Aug 01, 2014 7:49 am
Deviantart: KiaAzad
Discord: Kia#6810
Contact:

Re: [Tutorial] Customizing the Textbox

#106 Post by Kia »

while defining the character:

Code: Select all

who_size = 40,
if you need more pushing down try:

Code: Select all

what_ypos = 20,

Lightworker
Regular
Posts: 104
Joined: Sun Dec 13, 2015 2:06 pm
Projects: Detroit.exe
Discord: Happiness+#1168
Contact:

Re: [Tutorial] Customizing the Textbox

#107 Post by Lightworker »

Thanks! This was exactly what I needed.

User avatar
Soliloquy
Regular
Posts: 73
Joined: Tue Aug 25, 2015 3:42 pm
Location: Mt Holly, NJ
Contact:

Re: [Tutorial] Customizing the Textbox

#108 Post by Soliloquy »

I'm sorry if this is the wrong place. I honestly didn't know where else to put it. :oops:

I'm trying to figure out how to customize the name box after I set show_two_window to True. So far, all I've been able to do is change the background. I can't make it smaller than the default, nor can I force it to overlap the text box below. Is there a way to do so, or should I be working on images instead? ^^

User avatar
Kia
Eileen-Class Veteran
Posts: 1040
Joined: Fri Aug 01, 2014 7:49 am
Deviantart: KiaAzad
Discord: Kia#6810
Contact:

Re: [Tutorial] Customizing the Textbox

#109 Post by Kia »

for a fast fix you can mess with the say screen in screens.rpy, re-arrange the windows and re-position them as well.

Code: Select all

screen say(who, what, side_image=None, two_window=False):
    if not two_window:
        window:
            id "window"

            has vbox:
                style "say_vbox"

            if who:
                text who id "who"

            text what id "what"

    else:
        style "say_two_window_vbox"
        window:
            id "window"

            has vbox:
                style "say_vbox"

            text what id "what"
        if who:
            window:
                yalign .76
                style "say_who_window"

                text who:
                    id "who"
but I think there is other ways, I personally prefer changing everything in screens, it's much easier.

User avatar
Soliloquy
Regular
Posts: 73
Joined: Tue Aug 25, 2015 3:42 pm
Location: Mt Holly, NJ
Contact:

Re: [Tutorial] Customizing the Textbox

#110 Post by Soliloquy »

Kia wrote:for a fast fix you can mess with the say screen in screens.rpy, re-arrange the windows and re-position them as well.

Code: Select all

        if who:
            window:
                yalign .76
                style "say_who_window"

                text who:
                    id "who"
Ah! I was trying to put the yalign basically everywhere BUT there. I haven't quite gotten my head around when to use "what" and when to use "who" so I was trying everything under the sun trying to modify the "what." I'm gonna go headdesk, and then try this out. Thanks! XD

User avatar
doot
Newbie
Posts: 4
Joined: Sat Jan 02, 2016 8:23 pm
Projects: I'm a n00b. ._.
Contact:

Re: [Tutorial] Customizing the Textbox

#111 Post by doot »

Ohhh...so that's how you mod text boxes. Thanks! :D

ScoutDawson
Newbie
Posts: 3
Joined: Mon Feb 22, 2016 11:04 am
Tumblr: scoutdawson
Deviantart: scoutdawson
Contact:

Re: [Tutorial] Customizing the Textbox

#112 Post by ScoutDawson »

Unfortunately I can't view the sample game because I don't have a Windows computer :( I can't seem to get the name box to work, for some reason.

User avatar
Hijiri
Eileen-Class Veteran
Posts: 1519
Joined: Sun Mar 25, 2012 6:35 pm
Completed: Death Rule:lost code Overdrive Edition, Where the White Doves Rest-Tsumihanseishi
Projects: Death Rule: Killing System
Organization: MESI Games
IRC Nick: Hizi
Tumblr: mesigames
Skype: kurotezuka
itch: hijiri
Location: Los Angeles
Contact:

Re: [Tutorial] Customizing the Textbox

#113 Post by Hijiri »

ScoutDawson wrote:Unfortunately I can't view the sample game because I don't have a Windows computer :( I can't seem to get the name box to work, for some reason.
Post your code.
Image Image
"Perfection goal that always changes. Can pursue, cannot obtain."

User avatar
Impulse
Regular
Posts: 139
Joined: Wed Feb 24, 2016 5:44 pm
Projects: Tears of Glass [Romance VN, Supernatural, School, GxB]
Deviantart: mariscribbles
Contact:

Re: [Tutorial] Customizing the Textbox

#114 Post by Impulse »

You really helped me out with this one! I am using your dialogue box and name box in my game, but I might change that later on. Just wanted to tell you. Great job, I'm very grateful for this tutorial.
Current project (on hold):
Tears of Glass - [Romance otome, Supernatural, School, GxB] - http://lemmasoft.renai.us/forums/viewto ... 43&t=37523
Demo for Tears of Glass - viewtopic.php?f=45&t=38285

Zenytee
Newbie
Posts: 21
Joined: Thu Mar 24, 2016 2:31 pm
Contact:

Re: [Tutorial] Customizing the Textbox

#115 Post by Zenytee »

How can I do the text box style like in this picture: http://i63.tinypic.com/awt45c.png . And can I do the text style as well like in this picture? or I can only change fonts, text color and size in renpy?

User avatar
Soliloquy
Regular
Posts: 73
Joined: Tue Aug 25, 2015 3:42 pm
Location: Mt Holly, NJ
Contact:

Re: [Tutorial] Customizing the Textbox

#116 Post by Soliloquy »

Zenytee wrote:How can I do the text box style like in this picture: http://i63.tinypic.com/awt45c.png . And can I do the text style as well like in this picture? or I can only change fonts, text color and size in renpy?
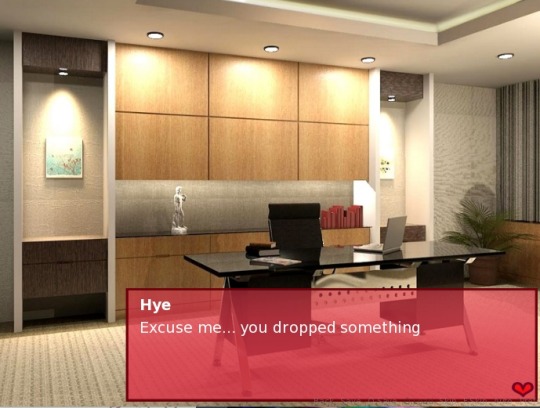
The short answer is: you can customize anything and everything, with enough time and patience. ^^

The long answer...

The text box I see there is either faded, or non-existent. So, first, you need to create a style for your box. I put this code in my options.rpy.

Code: Select all

style window:
    background Frame("yourimage.png",10,10)
The 10,10 is how much room (in pixels) that you're leaving for the corners of your image. Change those until you get the look that you like. There are tons of different properties that you can add to your box, to get it to look EXACTLY the way you want, but we'll save those until after you get the basics established. ^^

Also in options.rpy, I have this:

Code: Select all

style say_dialogue:
    font "yourfont.ttf"
    color "#000000"
    size 22
    outlines [(.5, "#666666", 0, 0)]
Make sure whatever font you want to use is in your game folder, and that it is in .ttf format. Ren'Py doesn't play nice with .otf.

That will change the font, the color, the size, and add an outline. The first number in outlines is how large the outline is. the smaller the number, the smaller the outline. I haven't gone above 1 myself, but I think that you can. The second number changes the outline color. The last two, the zeroes, are how far off-center from the text the outlines are. The first is for side-to-side, the second is for up-and-down.

If you're having trouble finding hex colors, try try this site, and if you need to change your font from .otf to .ttf, look here.

Hope that at least got you started. Happy tinkering!

User avatar
cloudypie
Newbie
Posts: 18
Joined: Tue Jun 14, 2016 7:23 pm
Projects: Moonlight drizzle
Location: México
Contact:

Re: [Tutorial] Customizing the Textbox

#117 Post by cloudypie »

Hello! This tutorial helped me a lot and now I have another question that might be a silly one. How do I get the Name box to show the customized name of the main Character? I have no issues with the NPC's but for the Main Character I tried everything. I don't know if it's because I'm defining it after the game starts without an init but it seems I'm unable to get it to work.

Code: Select all

init:
    $ H = Character("[H]", show_two_window = True)
    $ M = Character("Mark", show_two_window = True)

Code: Select all

label start:
    stop music fadeout 3.0
    show movie
    play movie "prologue/mystery.mpg"
    $ renpy.pause(24, hard=True)
scene name
$ H = renpy.input("Select your name")
$ H = H.strip()
if H == "":
        $ H="Hye"
$ J = renpy.input("Select your lastname")
$ J = J.strip()
if J == "":
        $ J="Jang"
label prologue:
scene bg_prologue
play music "prologue/Water Drops.mp3"
show movie
Image
Image
Image

User avatar
Aleema
Lemma-Class Veteran
Posts: 2677
Joined: Fri May 23, 2008 2:11 pm
Organization: happyB
Tumblr: happybackwards
Contact:

Re: [Tutorial] Customizing the Textbox

#118 Post by Aleema »

Well, things may be different now but try using DynamicCharacter() instead of Character().

elpsyco
Newbie
Posts: 4
Joined: Thu Aug 04, 2016 12:43 am
Contact:

Re: [Tutorial] Customizing the Textbox

#119 Post by elpsyco »

Thanks for your tutorial. I used it for my first VN: viewtopic.php?f=11&t=39851

User avatar
xavimat
Eileen-Class Veteran
Posts: 1461
Joined: Sat Feb 25, 2012 8:45 pm
Completed: Yeshua, Jesus Life, Cops&Robbers
Projects: Fear&Love
Organization: Pilgrim Creations
Github: xavi-mat
itch: pilgrimcreations
Location: Spain
Discord: xavimat
Contact:

Re: [Tutorial] Customizing the Textbox

#120 Post by xavimat »

@cloudypie: Avoid using the same variable name for the character itself (that's an object) and the character's name. Try using H for the character object and h for the name.
define H = Character("[h]", ...)
Comunidad Ren'Py en español: ¡Únete a nuestro Discord!
Rhaier Kingdom A Ren'Py Multiplayer Adventure Visual Novel.
Cops&Robbers A two-player experiment | Fear&Love Why can't we say I love you?
Honest Critique (Avatar made with Chibi Maker by ~gen8)

Post Reply

Who is online

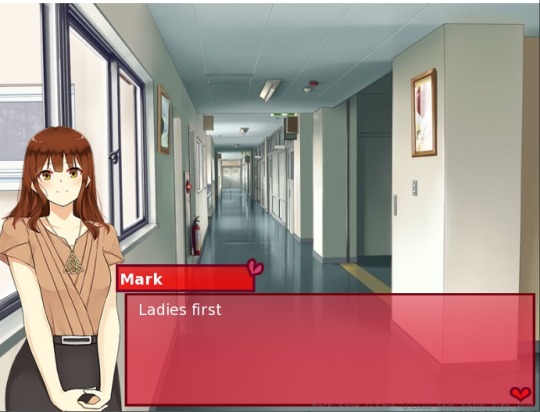
Users browsing this forum: No registered users