
Table of Contents:
- Using frames
- Using pre-fitted images
- Making character-specific textboxes
- Styling Text
- Styling the Names
- Click-to-Continue icon
Before we can explain how to customize your dialogue box, you need to design it first. The easiest way to do this is to render a mock of a dialogue box in your photo editor. Get it to look exactly how you want, text included. Even if it takes a little bit more work, it's possible to recreate most mock-ups.
There are two ways you can save your design to be incorporated into Ren'Py:
- Frames: Create a box that will be chopped up and sized automatically
- Pre-fitted Images: Simply drop in your image that you've created to already be the size you want

Dialogue boxes that use Frame look for the corners of the image, and then stretch whatever's in between to fit the proportions you give it in the code.

Code: Select all
style.window.background = Frame("PinkBox.png", 25, 25)Of course, Ren'Py didn't automatically fix my margins or text for me! Straight out of a new game, your new framed dialogue box will need a lot of tweaking. Most everything you need is already there for you, but it is commented out.
Go to your options.rpy file. Find these lines of code:
Code: Select all
    ## Margin is space surrounding the window, where the background
    ## is not drawn.

    # style.window.left_margin = 6
    # style.window.right_margin = 6
    # style.window.top_margin = 6
    # style.window.bottom_margin = 6

    ## Padding is space inside the window, where the background is
    ## drawn.

    # style.window.left_padding = 6
    # style.window.right_padding = 6
    # style.window.top_padding = 6
    # style.window.bottom_padding = 6

    ## This is the minimum height of the window, including the margins
    ## and padding.

# style.window.yminimum = 250The Margin of the box is for how far away the dialogue box is from the edges of the screen. This is what our PinkBox looks like with large margins (padding untouched):

Padding of the box is how far away the text is from the edges of the dialogue box. Here is what is looks like with large padding (margin back to default):

yminimum forces the box to be a certain amount of pixels high. Use it to define how tall the box must be at all times (but it can get taller if it needs to be). This is an important property for the pre-fitted image dialogue boxes next.
With your new frame box in Ren'Py, it is up to you to play around with padding and margin until it looks exactly how you want it to. Trial and error is sometimes the only path here. To make your life easier, you can take advantage of the refresh feature by hitting SHIFT+R to reload the game to see your changes immediately.

The other type is easier to implement because you have already placed it how you want it to look in your photo editor. The downside is that this isn't flexible and you will need to make new images for every alteration you want. The upside is that it's quick, easy, and you get the exact look you want.
To make this easy on you, do NOT crop your image to just the dialogue box in your editor. Instead, include the spaces around the edge (up to the top of the box) so that you don't have to alter margins within Ren'Py. This means that your resulting image should be as wide as your game (default: 800px).
Just insert your file name into the style.window.background property already in your options.rpy.
You'll need to make sure your yminimum is set to be the exact height of your image, and that your padding is altered so that it fights into your box (again, trial and error might be the only way). Set all your margins to 0. When you start your game, you should see your box! That was easy, wasn't it?
If you want a separate window for your character names, you can either save a namebox as a separate file (recommended) or include it in your dialogue box as one big image. The problem with the latter is that you will need to make two versions of the same image: one with the character box, and one without. Because the narrator (when no character is speaking) will look weird with an empty name box lying around.

To make two (or more) different versions of your text box, put the one you're going to use the most as the default:
Code: Select all
style.window.background = "dialoguebox.png"Code: Select all
$ narrator = Character(None, window_background="dialoguebox_noname.png")If you find you need to make specific adjustments for each character's text, you have to put properties like these into your character calls:
Code: Select all
    $ a = Character('Name', window_top_padding=15)
    $ b = Character('Name', what_xpos=50)
$ c = Character('Name', who_yalign=0.5)To save you keystrokes, you should format the default text style so you don't have to copy/paste your adjustments to every character.

To edit how your text looks, look a little further down in your options.rpy for these lines of code:
Code: Select all
    ## The file containing the default font.

    # style.default.font = "DejaVuSans.ttf"

    ## The default size of text.

# style.default.size = 22Code: Select all
    style.default.color = "#000000" #Makes text black
    style.default.drop_shadow = [(1, 1)] #Adds a shadow one pixel to the right and one pixel down
    style.default.outlines = [(4, "#ff0000", 0, 0), (2, "#fff", 0, 0)] #Adds a white outline 4 pixels thick, and then a black outline, 2 pixels thick
style.default.xalign = 1.0 #aligned the text completely to the rightStyle Inspector:
To edit specific text, like the name of the character, you need to find out what that text's style is called. An easy way to find styles is to launch your game and then hover your mouse over the text you want to change. Hit the keys SHIFT+I and a black screen will come up with all the styles and parent styles that object is using. The one that you want is the last style listed. If you see this:

Then you want say_label. For styles you can't hover on, you can try to find in the Style Hierarchy by hitting SHIFT+D.
Now that you have the style's name, you can plug it into this forumla:
Code: Select all
style.STYLE_NAME.PROPERTY = VALUEPROPERTY: What you want to change about that style. Again, you can find all the kinds of properties here.
VALUE: Whatever you're setting the style property to. Numbers for sizes, strings (things in quotes) for filenames, Hex values for colors, etc.
So if we wanted to edit say_label to be a different font, I would put this at the bottom of my options.rpy:
Code: Select all
style.say_label.font = "myfont.tff"
Using everything we learned on this page, we can now put each of the elements where we want and make them look how we want, with some respect to Ren'Py's limitations. There are two ways to show your character names: embedded into one dialogue window, or to have the name in a separate window from the dialogue box. By default, the name is embedded into one window. To change this, you need to insert a piece of code into your character definitions called show_two_window. Set it to True, and do this for every character you want to have a separate window. By default, it will inherit the same background as your dialogue box.
The styles for the name and window are:
say_label
say_who_window (only if show_two_window is True)
To change the background of your namebox, you would do it exactly like how you did it for the dialogue window, except you replace the style name with say_who_window:
Code: Select all
style.say_who_window.background = Frame("namebox.png", 15, 15)Use positional properties like xalign or xpos and xanchor to place the name within the box you have made.

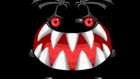
A fun feature is to show an icon to the player when they need to click in order to advance the story. To add this to your boxes, you need to add it to the characters you want to use it, like show_two_window.
Just link to the image's call name in quotes. If you want to animate it, build the animation first, and then link to the animations call name. Also, you can have the CTC indicator embedded into the text, placed right after the last word on the screen, or you can place it in a fixed location on the screen. Here is an example of an animated CTC icon that is placed in the corner of the screen (fixed):
Code: Select all
    image ctc_animation = Animation("ctc01.png", 0.2, "ctc02.png", 0.2, xpos=0.99, ypos=0.99, xanchor=1.0, yanchor=1.0)
$ a = Character('Name', ctc="ctc_animation", ctc_position="fixed")~~~
Putting all of this together, we can make a new text box like this:
~~~
Files I used in this tutorial plus a sample game with it in action for those who learn that way: