Lesleigh63's art thread
-
Lesleigh63

- Miko-Class Veteran
- Posts: 559
- Joined: Fri May 31, 2013 7:59 pm
- Completed: House of Dolls; Lads in Distress - Nano'16; Delusion Gallery Nano'18
- Projects: BL VN
- Deviantart: Lesleigh63
- Contact:
Lesleigh63's art thread
Working on backgrounds. I want a style that is almost realistic but doesn't clash with the anime/manga style of sprites. Feel I'm getting better at this with each new background I make. These are painted in corel photopaint.
- Attachments
-
- Studio
-
- Kitchen
-
- Classroom

-
merdeamour
- Veteran
- Posts: 307
- Joined: Sun Apr 21, 2013 10:23 pm
- Projects: Taleweaver's Curse
- Location: Philippines
- Contact:
Re: Lesleigh63's art thread
Oh my gosh. I absolutely love these. You're an amazing BG artist~ <3
What would life be if we had no courage to attempt anything?
-Vincent van Gogh
I manage a blog, Another Otome Diary where I give my two cents on otomes I've played. Check it out, or let me know if you want a game of yours reviewed!-
MaiMai

- Yandere
- Posts: 1757
- Joined: Sat Mar 21, 2009 6:04 pm
- Completed: [Phase Shift]
- Projects: [ None ]
- Organization: Paper Stars
- Tumblr: maiscribbles
- Deviantart: maiscribble
- Location: USA, Southern California
- Contact:
Re: Lesleigh63's art thread
The perspective is off in the kitchen background and it's especially noticeable with the way the kitchen sink appears. I think you're off to a good start though and I hope to see more BGs from you.
 COMMISSIONS AVAILABLE (check Tumblr sidebar)
-
Lesleigh63
- Miko-Class Veteran
- Posts: 559
- Joined: Fri May 31, 2013 7:59 pm
- Completed: House of Dolls; Lads in Distress - Nano'16; Delusion Gallery Nano'18
- Projects: BL VN
- Deviantart: Lesleigh63
- Contact:
Re: Lesleigh63's art thread
Hi Merdeamour - thanks for the comment. Glad you like them.
Hi MaiMai - thanks for the comment. Even though I'm working from photographs as the reference, I'm now making sure I trace my lines back to the vanishing points which should help with the perspectives.
Hi MaiMai - thanks for the comment. Even though I'm working from photographs as the reference, I'm now making sure I trace my lines back to the vanishing points which should help with the perspectives.
-
Lesleigh63
- Miko-Class Veteran
- Posts: 559
- Joined: Fri May 31, 2013 7:59 pm
- Completed: House of Dolls; Lads in Distress - Nano'16; Delusion Gallery Nano'18
- Projects: BL VN
- Deviantart: Lesleigh63
- Contact:
Re: Lesleigh63's art thread
Resurrecting my old art thread.
Wanted to post my art for my visual novel somewhere, but I'm not ready to start a WIP or ideas thread yet.
These are backgrounds. I need to find a quicker process but will wait until my next VN to experiment.
Wanted to post my art for my visual novel somewhere, but I'm not ready to start a WIP or ideas thread yet.
These are backgrounds. I need to find a quicker process but will wait until my next VN to experiment.
- Attachments
-
-
-
-
-
Ran08

- Miko-Class Veteran
- Posts: 737
- Joined: Tue Jun 12, 2012 1:17 am
- Completed: https://ran.itch.io/
- Projects: Fate's Cafe
- Tumblr: otometwist
- Skype: @otomeran
- itch: ran
- Location: Manila
- Contact:
Re: Lesleigh63's art thread
Your art has certainly gotten better!  The new BGs look prettier now. :") I especially like the parkfinal.jpg. The way you colored it is just... *sigh*
♡ Feel free to check out my game development blog~
♡ Once Upon A Hallow's Eve is a GxB Halloween otome.
♡ The Thing With Mistletoes is a GxB Christmas otome.
♡ Random VN reviews? Click me! You know you want to~
♡ Once Upon A Hallow's Eve is a GxB Halloween otome.
♡ The Thing With Mistletoes is a GxB Christmas otome.
♡ Random VN reviews? Click me! You know you want to~
Re: Lesleigh63's art thread
Very very pretty!  Do you just trace from photographs the perspective and put your own touches on the final? I would definitely like a wip. :3

-
Lesleigh63
- Miko-Class Veteran
- Posts: 559
- Joined: Fri May 31, 2013 7:59 pm
- Completed: House of Dolls; Lads in Distress - Nano'16; Delusion Gallery Nano'18
- Projects: BL VN
- Deviantart: Lesleigh63
- Contact:
Re: Lesleigh63's art thread
Thanks Ran08 - I'm paying more attention to perspective than I use to.
Hi Lilan. I use photographs (or multiple photographs to get the design for the lineart). Photo's usually have skewed perspective so I fix it (I'll use a perspective grid/s and I make all the vertical lines perpendicular (i.e. 0 degrees). Interiors and externals are painted differently - I use a lot of fills and gradients for internal walls/ceilings and all large flat surfaces plus some textures and I paint up details or items that don't look good using gradient fills (things like sofas and cushions etc].
I'm planning to post process shots for the next external and internal paintings I do [I have some already in the art dumpage (show your art) thread for the above paintings from pages 483 through to 486].
Re: Lesleigh63's art thread
Thanks for explaining your process. Hope to see an update on what your VN is like
-
Lesleigh63
- Miko-Class Veteran
- Posts: 559
- Joined: Fri May 31, 2013 7:59 pm
- Completed: House of Dolls; Lads in Distress - Nano'16; Delusion Gallery Nano'18
- Projects: BL VN
- Deviantart: Lesleigh63
- Contact:
Re: Lesleigh63's art thread
These are my process shots for an external background. It's different to my process for internal backgrounds where I tend to use fills and gradients for large flat surfaces such as walls, ceilings etc . With an external background I generally sketch, colour fill and then work up the details.
Step 1 - sketching or lineart
[attachment=9]brid2.jpg[/attachment]
[attachment=8]brid2c.jpg[/attachment]
I'm using a reference photo. As I don't own the photo, I'll change the architectural design and I'll also change the colour scheme (the photo is a daytime shot and I intend to do a night painting with very different colours and lighting).
I've paid attention to the perspective on the buildings but with the bridge I've just followed the curves of the photo (so my perspective overall may be a little off).
Step 2 - laying in colours
[attachment=7]colour.jpg[/attachment]
There are lots of different ways to do the initial laying in of colours. Some artists block in the various colours using the 'base' colour of each item. I prefer to use a lot more colour and start to build up the 3 dimensional feel of a painting. You could also do a grayscale underpainting and then add the colour over the top.
I use a hard brush at this stage.
I have three layers that the colour is on at this stage = the sky (background), the buildings (middle ground) the bridge (foreground).
I hate how a painting looks at this step - hideous (I always feel a little depressed).
I have another painting of this bridge from a different angle, so my colours here are matching the colours in my previous painting.
Step 3 = working up details
[attachment=6]detail1.jpg[/attachment]
I've changed my lineart to multiply and turned it down a bit so I can just see it.
I've duplicated my background, middle ground and foreground layers and applied a gaussian blur to the duplicates. I've left the blur layer on top of the original for the background but I've put it under the originals for the foreground and middle ground. This just helps soften the transition between the foreground, middle ground and background.
I've started to work up the details in the bottom left corner. I've painted in some palings and railings for the walkway and the bridge itself and I've been working up the water under the bridge.
The new stuff is done on separate layers and I use a soft brush. When I want to blend colours I use a soft brush (usually with a higher transparency setting), an airbrush on occassion (you can see this later when I paint the clouds in the sky) and if I can't get the smoothness I'm looking for with a brush, I'll go to a blending tool/brush (I like to use 'undither' rather than 'smudge' - I find 'undither' keeps my colours clean where as smudge can make them go muddy sometimes).
I'm also colouring my lineart as I go.
Step 4 - more working up of details
[attachment=5]detail2.jpg[/attachment]
The bridge walkway and railings is completed.
The palings are drawn with the line tool and are on a separate layer to the shadows between the palings. This way I can paint the shadow on a layer underneath the palings (it lets me adjust how dark or light I want the shadow to be later on when I've more of the painting done).
The walkway itself has a texture applied to it. I find this useful for large flat areas (such as the walkway and the roof). I probably had the walkway blended to the same extent as the roof before adding the texture (which helped smooth the walkway out colourwise but also helped give it the look of cement).
The posts have been smoothly blended and I added some shadows.
Step 5 - still working up the painting
[attachment=4]detail3.jpg[/attachment]
The walkway roof is now done. I added the same texture as the floor but I also painted in some lines to give the 'tracks'.
Step 6 - The white poles
[attachment=3]detail4.jpg[/attachment]
Working to smooth out the paint strokes on the white poles spanning the bridge. Using a soft brush and also a the undither blending brush.
Step 7 - the middleground buildings
[attachment=2]detail6.jpg[/attachment]
Painted up the middle ground buildings.
I decided the lights on the roof of the walkway were too small, so I isolated them, duplicated them and enlarged them.
Used the airbrush and soft brush to soften the clouds of the sky.
Step 8 - final details
[attachment=1]detail7.jpg[/attachment]
Added some of the final details such as the lights shining onto the bridge poles, and the steel wires holding the poles in place.
Step 9 - final adjustment
[attachment=0]final.jpg[/attachment]
Combined all my layers. Duplicated that layer and then hit 'auto-adjust'.
I liked the result, so I'll keep the auto-adjusted painting.
- Attachments
-
- Completed external background
-
- Detail 6
-
- Detail 5
-
- Detail 4
-
- Detail 3
-
- Detail 2
-
- Details 1
-
- Colours
-
- Completed lineart
-
- Early lineart
-
Lesleigh63
- Miko-Class Veteran
- Posts: 559
- Joined: Fri May 31, 2013 7:59 pm
- Completed: House of Dolls; Lads in Distress - Nano'16; Delusion Gallery Nano'18
- Projects: BL VN
- Deviantart: Lesleigh63
- Contact:
Re: Lesleigh63's art thread
Process shots for lineart/sketch for a city street scene.
Using single point perspective.
I'm using a photo for reference.
I tried putting the lights on the left in a straight line, but it looked too 'ordered' so I shifted them around in the next pic.
-
Lesleigh63
- Miko-Class Veteran
- Posts: 559
- Joined: Fri May 31, 2013 7:59 pm
- Completed: House of Dolls; Lads in Distress - Nano'16; Delusion Gallery Nano'18
- Projects: BL VN
- Deviantart: Lesleigh63
- Contact:
Re: Lesleigh63's art thread
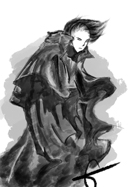
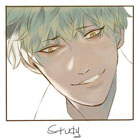
And these were done for NanoReno2016 (Lads in Distress).
Was trying for a softer style to match sprites with a water-colour look.
Was trying for a softer style to match sprites with a water-colour look.
- Attachments
-
-
-
-
-
-
Lesleigh63
- Miko-Class Veteran
- Posts: 559
- Joined: Fri May 31, 2013 7:59 pm
- Completed: House of Dolls; Lads in Distress - Nano'16; Delusion Gallery Nano'18
- Projects: BL VN
- Deviantart: Lesleigh63
- Contact:
Re: Lesleigh63's art thread
Forgot about my personal art thread.
I've picked up my visual novel project again and am continuing with the background art (started it nearly 2 yrs ago - and I've changed how I do things since then, so it does look a little different).
Really like how the park bg turned out, but I think I'd struggle to recreate it (more luck than skill I think); but I'm learning with each one. At least I'm getting quicker now.
Who is online
Users browsing this forum: No registered users